Kids who make their beds and put away the dishes are a dream. But those good habits didn’t just come naturally. It took practice and (let’s be honest) prodding to get those tasks on autopilot.
With a little of that same nudging and some strategic compromise, you can get even the littlest of kids into a flossing routine.
Not convinced this is a daily battle you want to take on? Consider that by age 8, more than 50% of kids have a cavity in one or more of their baby teeth, reports the Centers for Disease Control and Prevention.
In addition to regular dental checkups, daily brushing and flossing is the best way to stop cavities.
“Flossing is important because it reaches areas of the teeth that a brush cannot,” says Gila Dorostkar, D.D.S., a pediatric dentist based in Mill Valley, California, who’s also on the board of the American Academy of Pediatric Dentistry.
Did you know your child can see a dentist at school?
Your Premier Access plan makes it easy. No travel. No scheduling hassles. No additional cost to you! Click below to find your school and sign up.*
*You’ll be directed to MySchoolDentist to complete a permission form.
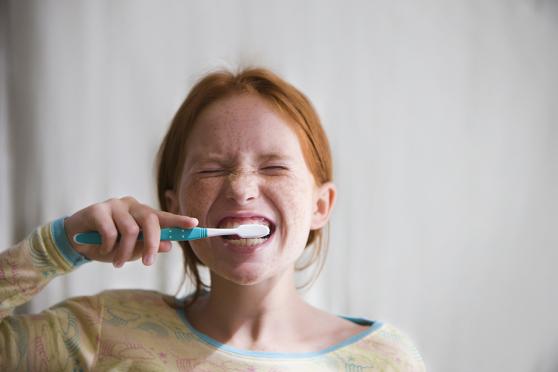
Why kids need to both brush and floss
The foods your child enjoys have a way of hanging around on their teeth even after they’ve washed it down with a glass of water or milk.
The sugar in food combines with bacteria that lives in their mouth. Together, they make a sticky substance called plaque. If the plaque isn’t removed by flossing and brushing, it leaves an opening for cavities to form.
“Brushing a child’s teeth twice a day is essential for removing that plaque,” says Dr. Dorostkar. “But once the teeth start to touch, you need to introduce flossing.”
Flossing also helps:
- Freshen and prevent bad breath
- Safeguard tooth enamel (the protective outer covering on your teeth)
- Remove food particles from between the teeth
- Protect against the gum disease gingivitis
“Brushing is the first line of defense against tooth decay, bad breath, and gum disease,” says Dr. Dorostkar. “But flossing is a close second.”
Keep reading for three dentist-approved tips to raise a flosser. (Find simple ways to put an end to brushing battles here.)
Tip #1: Show, don’t tell.
Flossing is one area where parents need to walk the walk. “Just getting into the habit of practicing good oral hygiene is the most challenging thing for kids,” says Elliot Schlang, D.D.S., chief dental officer of Smile America Partners.
To get your child on board, have them watch you floss and give them some pointers along the way. (See “How do I know if I’m flossing my child’s teeth correctly?” below for the steps.)
Dr. Dorostkar says it really doesn’t matter if you and your child floss before or after you brush. That said, one 2018 study showed flossing first could help with reducing some buildup on your child’s teeth.
Remember, your goal is to build the habit. Making it a family affair helps kids understand that flossing is just one more part of your daily routine, says Dr. Schlang.
Tip #2: Start early.
The sooner you introduce flossing, the easier it will be, says pediatric dentist Ricardo A. Perez, D.D.S., of Chevy Chase, Maryland.
Brushing and flossing your baby’s teeth gets them used to the feeling of having you reach inside their mouths, Perez says. In fact, the American Academy of Pediatric Dentistry recommends that parents start flossing a child’s teeth once a day as soon as two baby teeth touch — as early as age 2 or 3.
“This is earlier than some parents realize,” says Dr. Dorostkar. Plan to keep flossing for your child until they are 7 or 8. Some kids as old as 10 or even 11 may still need some parental help, Dr. Dorostkar adds.
When you’re flossing for your child, “focus between the molars,” says Dr. Perez. “Those areas are prone to cavities.”
Tip #3: Let your child choose their floss.
Minty. Waxed. Thread. Stick. Brightly colored. Character shaped. There’s no shortage of floss options at the grocery store.
Landing on the right floss for your child will involve some trial and error at first. And that’s to be expected, says Dr. Dorostkar. “Use whatever kind of floss your child is most likely to be excited about and will use.”
If your child doesn’t have a preference, Dr. Dorostkar suggests trying waxed floss. “Waxed floss glides between the teeth,” she says. Unwaxed floss can shred more easily.
As your kids move into the older toddler and preschool stage and you’re trying to encourage more independence, you might want to give flossing sticks (also called dental picks) a go. These sticks have a plastic handle that holds a piece of floss. They’re often easier for kids to use on their own, and many parents also find them easier to use when reaching into a small child’s mouth, says Dr. Dorostkar.
For older, school-age kids, try switching to string floss that you wrap around your fingers. You can show them how to make the floss a little tighter by changing your finger position, says Dr. Dorostkar.
It’s all right to let kids try to do some of the flossing on their own. You can always step in to cover any places they’re struggling to reach.
How do I know if I’m flossing my child’s teeth correctly?
Many adults don’t have a handle on the proper way to floss their own teeth. Add in the awkwardness of reaching into the tiny mouths of your children, and the whole process can quickly strain your patience.
Try following these steps from the American Dental Association:
- If you’re using floss string, hold it tightly. Or use a prethreaded flosser.
- Very gently, pull the floss between two teeth.
- Use a gentle, rubbing motion to reach the gumline.
- Curve the floss against one tooth in a C shape.
- Gently slide it into the space between the tooth and the gum.
- Hold the floss slightly away from the gum. Gently run the side of the tooth in an up-and-down motion.
- Follow the shape of the tooth.
- Repeat this method wherever two teeth touch.
For babies and toddlers, the flossing process is the same. But you might want to try flossing your child’s teeth while they lie flat.
“It’s more natural for a child to open their mouth when they’re lying down,” says Dr. Dorostkar. This position also allows you to see the top and bottom teeth better. This can even be done on a changing pad, she says.
If your child’s gums bleed, it’s usually a sign that you need to make some slight adjustments to your technique, says Dr. Dorostkar.
- Use a gentle seesaw motion — avoid “snapping” the floss roughly through the teeth.
- Hug the floss around each tooth to gently lift out plaque and food particles.
If you have questions about building a strong flossing habit, bring it up with your child’s dentist during their regular dental checkup. Taking the time early on to build those good dental habits will set them up for better overall health in the future.
Sources:
- Cavities Centers for Disease Control and Prevention Oral Health Surveillance Report
- Importance of Flossing University of Illinois Chicago
- Tooth Enamel Cleveland Clinic
- Plaque American Dental Association’s MouthHealthy
- Did You Know… American Academy of Pediatric Dentistry
- When to Floss Cleveland Clinic
- Flossing American Dental Association’s MouthHealthy